
Answer
Avoiding common DIY painting mistakes means prioritizing proper surface preparation, selecting the right tools and paint, and applying coats correctly for a smooth, lasting finish. Phoenix Painting emphasizes that homeowners often underestimate the importance of these steps, leading to paint failures like peeling or uneven coverage that necessitate costly reworks. Addressing issues such as inadequate cleaning or incorrect drying times upfront saves time and money, ensuring a professional-looking result.
Overview
Preventing common DIY painting mistakes ensures a smoother project and a better finish. The following sections detail various errors, from inadequate surface preparation to incorrect application techniques. By addressing these pitfalls, homeowners can achieve results closer to professional standards. We also examine a real-world hypothetical scenario involving Liam, offering practical recommendations for a successful painting project.
- Surface Prep: Proper surface preparation avoids issues like peeling paint.
- Tool Choices: Choosing the right paint and tools prevents uneven coverage.
- Real-World Example: A scenario illustrates application errors and their impact.
- Drying Stages: Avoiding drying mistakes helps finishes last.
- Safety First: Addressing skipped safety precautions keeps projects safe.
- Professional Help: Consider painting professionals for complex jobs.
Surface Prep Errors That Ruin Jobs
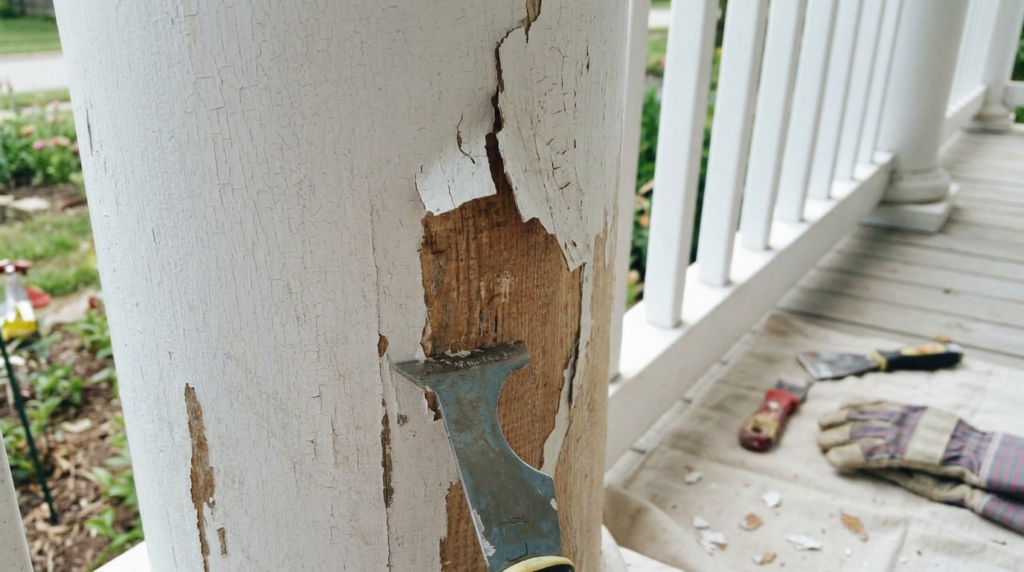
Proper surface preparation prevents paint failures like peeling or bubbling, saving significant time and effort in the long run. Skipping crucial steps, such as thorough cleaning or patching, often leads to unsightly results and reduces paint longevity. We see many homeowners in Edmonton face these challenges when attempting projects without professional guidance.
Phoenix Painting emphasizes that even small DIY painting mistakes during preparation can undermine the entire job. For example, applying paint over dusty or greasy surfaces prevents proper adhesion, causing the finish to flake prematurely. Ensuring a clean, smooth base is essential for any successful painting project.
| Error Type | Consequence |
|---|---|
| Skipping Cleaning | Paint will not adhere properly to dirt, dust, or grease, leading to peeling or chipping. |
| Inadequate Sanding | Rough spots or previous paint imperfections show through new coats, creating an uneven finish. |
| Not Patching Holes/Cracks | Surface damage remains visible, making the wall appear unfinished or damaged despite new paint. |
| Ignoring Primer | Paint may absorb unevenly, requiring more coats, or the old color may bleed through. Painting Prep Steps |
| Wet Surfaces | Moisture trapped beneath paint causes blistering, peeling, and potential mold growth. |
| Loose Paint Removal | Old, flaking paint beneath new coats leads to immediate peeling of the fresh finish. top Painting Mistakes |
Wrong Paint and Tool Choices
Selecting inappropriate paint types or using inadequate tools often leads to poor finishes and wasted effort in painting projects. For instance, applying interior paint outdoors results in premature peeling due to lack of weather resistance, a common problem we observe in residential painting. Choosing the correct products ensures durability and a professional appearance.
Using subpar brushes or rollers leaves visible streaks and uneven textures, detracting from the final look. Phoenix Painting recommends investing in quality applicators designed for the specific paint and surface to avoid these issues. Homeowners often underestimate how much the right tools improve paint adhesion and coverage, leading to fewer DIY painting mistakes.
| Paint/Tool Type | Common Mistake | Better Choice/Reason |
|---|---|---|
| Flat Interior Paint | Using on high-traffic walls or exteriors. | Eggshell or semi-gloss for durability; exterior paint for weather resistance. |
| Economy Brushes | Causes streaking and shedding bristles. | Synthetic bristles for latex paints; natural bristles for oil-based. |
| Incorrect Roller Nap | Leaves excessive texture or poor coverage. | Short nap for smooth surfaces, medium for lightly textured walls, long for rough surfaces. |
| Painter’s Tape | Using low-quality tape or removing it too late. | Blue painter’s tape for clean lines, removed when paint is still slightly wet. top painting mistakes |
| Oil-Based Primer | Applying without proper ventilation or over latex. | Water-based primers for general use, stain-blocking primers for specific issues. diy vs pro |
Application Errors Causing Uneven Finishes
DIY painting projects can seem straightforward, but skipping crucial preparation steps often leads to costly errors. Homeowners frequently encounter issues like poor adhesion or an uneven finish, requiring more time and money to correct.
Liam is eager to refresh his living room walls with a new coat of paint, aiming for a professional look without the expense of hiring professionals. He’s concerned about common DIY painting mistakes and wonders if investing extra time in cleaning and sanding is truly necessary. Should Liam prioritize surface preparation over immediate paint application to ensure a professional finish in his home in Edmonton?
Recommendation: Thorough Surface Preparation
Phoenix Painting recommends prioritizing thorough surface preparation when undertaking a DIY painting project. This involves meticulous cleaning, sanding, and priming to ensure optimal paint adhesion and a smooth, durable finish, preventing future peeling or imperfections.
Drying and Curing Stage Mistakes
Ignoring proper drying and curing times is a frequent cause of poor paint finishes and reduced durability. Each coat of paint requires adequate time to dry before applying the next, and the final coat needs to cure fully for maximum hardness and resistance to damage. Rushing these stages can lead to various surface imperfections and compromise the paint’s lifespan.
Phoenix Painting often observes that homeowners in Edmonton, Alberta, sometimes underestimate how ambient temperature and humidity affect paint drying. Proper ventilation and controlled conditions are necessary to ensure each layer dries correctly. Skipping these steps can lead to further DIY painting mistakes that become visible only after the project is complete.
- Applying subsequent coats too quickly traps solvents, causing bubbling or wrinkling on the surface. This also prevents the paint from adhering properly, reducing its longevity.
- Failing to allow paint to cure before resuming normal use of the painted surface can result in nicks, scratches, or premature wear. Curing is a chemical process that strengthens the paint film over days or weeks.
- Painting in high humidity or low temperatures slows drying and curing, leading to tackiness, uneven sheen, and increased susceptibility to dust and debris. Conversely, excessive heat can cause paint to dry too fast, preventing proper leveling and creating brush marks.
- Inadequate ventilation during drying can trap moisture and fumes, contributing to slow drying times and potential health concerns. Good airflow helps evaporate solvents evenly and quickly.
- Cleaning painted surfaces too soon after application can damage the soft, uncured paint film, leaving marks or removing portions of the finish. Always check manufacturer guidelines for cleaning schedules.
- Touching or disturbing the painted surface before it is fully dry, even if it feels dry to the touch, often leaves fingerprints or imperfections. Paint may feel dry but still needs time to harden internally.
- Improper storage of leftover paint can affect its future usability, leading to separation or thickening. Always seal paint cans tightly and store them in a cool, dry place away from direct sunlight. Properly Storing Paint
Overlooking these steps impacts both the aesthetics and resilience of your painted surfaces. For surfaces needing extra care, professional painting services account for environmental factors and curing timelines.
Skipped Safety Precautions
Neglecting safety measures during painting projects increases the risk of accidents and exposure to harmful substances. These risks range from minor irritations to serious injuries, often leading to additional costs for medical treatment or property repair. Phoenix Painting observes that many do-it-yourself painting mistakes stem from insufficient preparation, particularly concerning personal protection and proper ventilation.
Proper safety gear protects against paint fumes, spills, and accidental contact with chemicals. Ignoring these basic precautions can result in respiratory issues, skin irritation, or eye injuries. For example, failing to wear appropriate masks when working with oil-based paints can cause dizziness or nausea. We always recommend wearing gloves and safety glasses, especially when handling solvents or cleaning agents.
Choosing not to prioritize safety can have serious consequences. Here is a summary of common safety oversights and their potential impact:
| Safety Oversight | Potential Impact |
|---|---|
| No ventilation in enclosed spaces | Respiratory problems, dizziness, headaches from fumes |
| Lack of eye protection | Paint splatters causing eye irritation or chemical burns |
| Inadequate skin coverage | Dermatitis, allergic reactions, paint absorption through skin |
| Ignoring ladder safety | Falls, fractures, head injuries, or property damage |
| Improper storage of chemicals | Accidental spills, fires, or exposure to children and pets |
| No drop cloths or coverings | Stains on flooring or furniture, creating slip hazards |
| Mixing incompatible chemicals | Toxic fumes or dangerous reactions |
| Disregarding electrical outlets | Electric shock when painting near exposed wiring or switches |
| No fire extinguisher nearby | Inability to address paint-related fires quickly |
| Working alone on high ladders | No immediate help in case of a fall or injury |
Homeowners often underestimate the physical demands and hazards of painting, which is a common source of DIY painting mistakes. When you are performing any home improvement project, always prioritize personal safety by wearing appropriate gear and ensuring a safe working environment. Consider reviewing safety services if you are unsure about handling specific paint types or equipment. If you choose to undertake a large project, make sure to read about Painting Prep Steps for the safety of yourself and your family.
When to Call Painting Professionals
Deciding when to hire a professional painter versus continuing a do-it-yourself project depends on several factors, including project complexity, required tools, and available time. Many homeowners discover that intricate jobs like high ceilings, detailed trim work, or extensive surface preparation quickly exceed their skill level and patience. Attempting these tasks without proper experience often leads to more costly repairs or repaints later.
Phoenix Painting often advises clients that larger homes or projects involving multiple rooms benefit significantly from professional execution. We handle specialized tasks such as plaster repair, wallpaper removal, and color matching with precision, ensuring a consistent and lasting finish. If the prospect of making DIY painting mistakes seems daunting, or if you simply lack the time, professional services offer a reliable solution.
If you face challenging areas or need a flawless finish, consider these situations where a professional painter makes a real difference:
| Situation | Benefit of Professional Service |
|---|---|
| Complex Surfaces (e.g., textured walls, intricate trim) | Achieve uniform coverage and sharp lines; avoids common issues like drips or uneven application. |
| High Ceilings or Hard-to-Reach Areas | Professionals use specialized equipment and techniques for safe and efficient work. |
| Time Constraints or Tight Deadlines | Accelerate project completion with a dedicated crew, ensuring quality despite time pressures. |
| Extensive Damage Requiring Repair | Address drywall patches, water stains, or other surface imperfections correctly before painting. |
| Specific Finishes (e.g., faux finishes, specialty coatings) | Deliver expert application for unique aesthetic goals that require specific skills. |
| Large-Scale Projects (whole home, exterior) | Manage logistics, material quantities, and execution for consistent results across a big job. |
For demanding painting projects or when you want a guaranteed high-quality outcome, professional painting services can provide peace of mind. Phoenix Painting ensures every detail is managed, from preparation to the final coat. Learn more about our approach and see client experiences on our About page.
FAQ
To help you achieve a flawless finish and avoid common DIY painting mistakes, we’ve compiled answers to some frequently asked questions about painting projects.
| Question | Answer |
|---|---|
| Should Liam prioritize surface preparation over immediate paint application for his Edmonton living room? | Yes, Phoenix Painting recommends prioritizing thorough surface preparation. This involves meticulous cleaning, sanding, and priming to ensure optimal paint adhesion and a smooth, durable finish. This prevents future peeling or imperfections. |
| What happens if I apply the next coat of paint too soon in Edmonton? | Applying subsequent coats too quickly traps solvents, which can cause bubbling or wrinkling on the surface. This also prevents proper adhesion, reducing the paint’s longevity. |
| Why is using the right roller nap important for DIY painting? | Using the incorrect roller nap can leave excessive texture or result in poor coverage on your walls. A short nap is best for smooth surfaces, a medium nap for lightly textured walls, and a long nap for rough surfaces. |
| When should a homeowner in Edmonton consider hiring professional painters instead of DIY? | Consider hiring professionals for intricate jobs like high ceilings, detailed trim work, or extensive surface preparation that may exceed your skill level or patience. Projects involving larger homes or multiple rooms also benefit from professional execution. |