
Answer
Achieving a smooth, long-lasting paint finish relies heavily on thorough preparation. The most effective painting prep steps include cleaning surfaces, making necessary repairs, sanding for adhesion, and properly masking areas not to be painted. Phoenix Finishing Touch Painting emphasizes these foundational stages for every project to help ensure a professional and durable result.
Overview
Proper preparation is key to a lasting paint finish, impacting both appearance and longevity. The following sections describe essential methods for preparing surfaces, choosing appropriate materials, and safeguarding your home during a painting project. This article also includes a labeled real-world hypothetical scenario about Olivia’s experience with paint preparation, pointing toward a successful outcome.
- Prep Basics: Learn about key steps for paint application.
- Tools and Paint: Discover how to select proper tools and materials.
- Real-World Example: See how protecting your space prevents common issues.
- Surface Prep: Find out about cleaning and repairing surfaces for paint.
- Professional Help: Consider hiring for prep tasks.
- Pro Finish: Get tips to achieve a clean finish.
Essential Painting Prep Steps
Achieving a smooth and long-lasting paint finish begins well before the first coat applies. Skipping foundational tasks leads to bubbling, peeling, or uneven color distribution that compromises the final look. Phoenix Finishing Touch Painting emphasizes meticulous preparation to ensure a durable and aesthetically pleasing paint finish for every project.
We believe that the success of any painting project hinges on the quality of its prep work. These initial painting prep steps directly influence paint adhesion and overall longevity. Proper preparation also minimizes costly corrections later on, making the entire process more efficient for homeowners in Edmonton.
| Preparation Task | Why It Matters |
|---|---|
| Cleaning Surfaces | Removes dirt, grease, and grime that prevent paint from sticking properly. This ensures a clean base for optimal adhesion. For more details on wall prep, see prep walls for painting. |
| Repairs and Patching | Fills holes and cracks, creating a smooth, even surface. This prevents imperfections from showing through the new paint. |
| Sanding | Creates a slightly roughened texture for better paint grip, especially on glossy or previously painted surfaces. |
| Priming | Seals porous surfaces, blocks stains, and provides a uniform base coat for the new color. |
| Masking and Drop Cloths | Protects areas not being painted, preventing accidental drips and ensuring clean lines. Consider our full services for your next project. |
Choose Right Paint and Tools
Selecting the correct paint type directly impacts the durability and finish of a project. Different surfaces and environmental conditions require specific paint formulations to ensure proper adhesion and longevity. For instance, high-traffic areas or moisture-prone rooms need more resilient paint, while paint finish types affect both appearance and practicality.
Matching paint to the surface is a key step that influences the final outcome. We often recommend a primer tailored to the existing surface and new paint type to improve adhesion and hide imperfections. Phoenix Finishing Touch Painting advises clients in Edmonton on optimal paint choices for their specific projects, considering factors like direct sunlight exposure or humidity levels in a room.
Essential tools are also part of effective painting prep steps, ensuring smooth application and professional results. Brushes, rollers, and trays vary in quality and purpose, affecting how paint applies to walls and trim. Using the right tools for each part of the job makes the application process more efficient and contributes to a smoother, more even coat.
| Paint Type / Tool | Considerations for Use |
|---|---|
| Latex Paint | Easy cleanup with water, fast drying, good for walls and ceilings. Best for general indoor surfaces. |
| Oil-Based Paint | Durable finish, ideal for trim, doors, and high-moisture areas. Requires mineral spirits for cleanup. |
| Primer | Improves paint adhesion, hides stains, and ensures even color. Choose specific primers for bare wood, drywall, or glossy surfaces. |
| Brushes | Natural bristles for oil-based paint, synthetic for latex. Different sizes and shapes work best for specific areas like trim or corners. |
| Rollers | Various nap sizes for different textures; short nap for smooth surfaces, longer nap for textured walls. This impacts paint distribution. |
| Paint Trays | Essential for holding paint, allowing for even roller loading. Deeper trays can help manage larger paint volumes. |
| Paint Scrapers | Useful for removing old, loose paint before applying new coats. This helps create a smooth base layer. |
| Sandpaper | Used to smooth surfaces and create a better adhesion profile for new paint. Different grits are for varying levels of smoothness. |
| Caulk Gun & Caulk | Fills small gaps and cracks around trim and windows, sealing out moisture and improving appearance. |
| Cleaning Supplies | Degreasers and mild detergents remove dirt and grime, preparing surfaces for optimal paint adherence. For more house painting advice, consult a professional. |
Protect Your Space: Drop Cloths and Masking
Achieving a professional, long-lasting paint finish requires meticulous attention to surface preparation. Skipping or rushing these crucial steps can lead to peeling, uneven textures, and a compromised final look.
Olivia is excited to refresh her Edmonton living room with a new coat of paint but is overwhelmed by the preparation involved. She’s unsure which specific prep steps will yield the best results for her walls and is wondering if she needs to tackle all of them before applying the first coat? Should I focus on deep cleaning, making repairs, or sanding before I start painting my living room walls?
Recommendation: Comprehensive Painting Preparation
Phoenix Finishing Touch Painting recommends a thorough approach to painting prep steps, including cleaning, repairing, and sanding, to ensure optimal adhesion and a smooth finish. Prioritizing these foundational stages will lead to a more durable and professional-looking result for your project.
Surface Preparation: Clean, Sand, Repair
Proper surface preparation sets the foundation for a durable and attractive paint finish. It involves a series of cleaning, sanding, and repairing steps that directly impact how well new paint adheres and looks. Overlooking any part of this process can lead to blemishes appearing through the fresh coat.
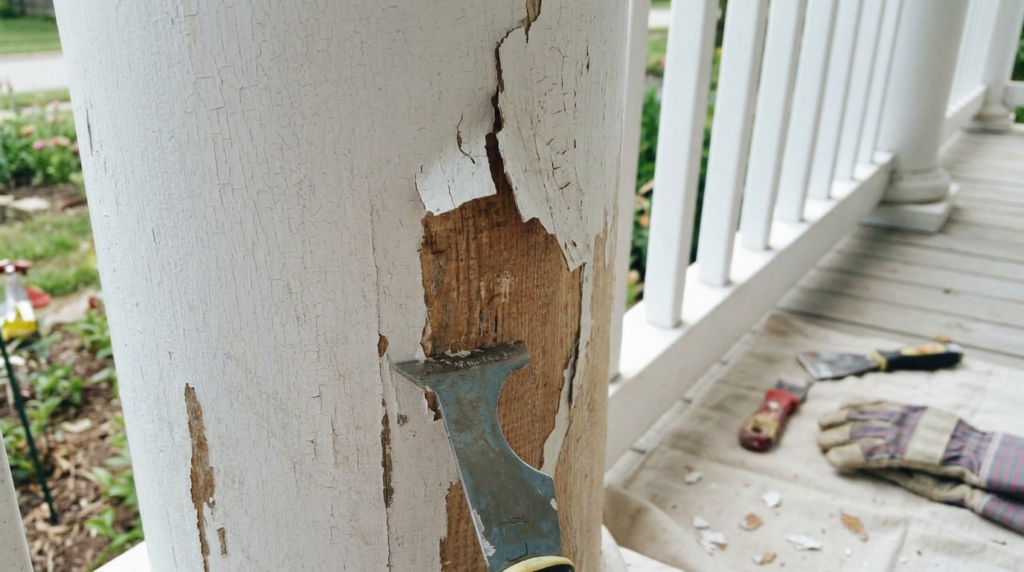
Phoenix Finishing Touch Painting regularly addresses surfaces that show signs of inadequate preparation, such as peeling paint or visible imperfections. We always ensure each surface is meticulously prepared, as it helps prevent future issues and extends the life of the paint job. A well-prepared surface allows the new paint to bond correctly, preventing early failure.
- Clean walls thoroughly to remove dirt, grease, and grime.
- Lightly sand surfaces to create a smooth finish and improve adhesion.
- Repair any cracks, holes, or imperfections with appropriate fillers.
- Wipe down surfaces again to remove dust after sanding.
Each step in these painting prep steps contributes to a smooth final product. For instance, cleaning removes contaminants that could interfere with paint adhesion, while sanding rough areas or old finishes creates a better grip for new paint. Neglecting these actions can result in uneven color or texture. You can find more detail on preparing walls in our guide on how to prep walls.
| Preparation Task | Tools and Materials Needed | Benefit to Finish |
|---|---|---|
| Cleaning | Mild detergent, sponges, buckets, rags | Removes oils and grime for better paint adhesion |
| Sanding | Sanding blocks, sandpaper (medium to fine grit), pole sander | Smooths surfaces, helps paint bond |
| Repairing | Spackle, patching compound, putty knife | Eliminates imperfections like holes and cracks |
| Dust Removal | Tack cloths, vacuum with brush attachment | Prevents dust from mixing with paint |
Addressing existing damage, like filling holes or patching drywall, ensures an even surface. Ignoring these repairs means imperfections remain visible even after painting, diminishing the overall appearance. Considering professional services can guarantee all details are covered before paint goes on.
When to Hire for Prep Work
Determining when to bring in professional painters for prep work saves time and helps ensure a quality finish. Many homeowners can handle basic tasks, but certain conditions make professional assistance advisable. Phoenix Finishing Touch Painting often recommends hiring experts for complex surfaces or when significant repairs are necessary.
Professional services can address issues such as extensive drywall damage, old paint removal, or working with intricate trim. Attempting these tasks without experience often results in visible imperfections that impact the final paint job. We see this frequently in older homes here in Edmonton, where walls may have decades of wear or multiple layers of paint requiring specialized attention.
Consider the scope of your project and your skill level before starting. If the work involves specialized equipment or techniques, professional painting prep steps can make a substantial difference in the outcome.
| Situation | Recommendation |
|---|---|
| Extensive drywall repair or patching | Hire a professional for smooth, seamless wall surfaces. |
| Multiple layers of old paint to remove | Consider professional paint removal methods to avoid damage and ensure proper adhesion. |
| High ceilings or difficult-to-reach areas | Professionals have the right equipment and experience for safe and efficient preparation. |
| Time constraints or busy schedule | Delegating painting prep steps to experts can expedite the project timeline. |
| Desire for a flawless, long-lasting finish | Professional preparation provides a superior foundation for any painting services. |
Achieve a Professional Look
Diligently executing painting prep steps directly impacts the final appearance and longevity of your paint job. Proper preparation ensures that paint adheres correctly, creating a smooth, even finish that resists peeling and cracking over time. This attention to detail contributes to a result that truly stands out.
Skipping even one of these critical steps can compromise the entire project. For instance, paint applied to an unclean or unsanded surface often shows imperfections and wears prematurely. Phoenix Finishing Touch Painting consistently observes that projects with thorough preparation from the outset lead to greater client satisfaction and more durable finishes here in Edmonton.
| Benefit of Proper Preparation | Outcome for Your Home |
|---|---|
| Enhanced paint adhesion and durability | A longer-lasting finish that resists chipping |
| Smoother, more uniform paint finish | A professional appearance free of streaks or bumps |
| Reduced likelihood of paint peeling or cracking | Preserved aesthetic and structural integrity of the coating |
| Cleaner project completion with less mess | Protection of furniture and flooring during the process protecting your space |
For homeowners aiming for flawless results, these painting prep steps are non-negotiable. Phoenix Finishing Touch Painting recommends professional preparation for any significant painting project, especially when surfaces require repairs or specialized cleaning, to help ensure an impeccable finish. This approach helps avoid diy painting mistakes and delivers a truly polished appearance.
FAQ
To help you achieve a flawless finish, we’ve compiled answers to common questions about the essential painting prep steps.
| Question | Answer |
|---|---|
| Should I focus on deep cleaning, making repairs, or sanding before I start painting my living room walls? | Phoenix Finishing Touch Painting recommends a thorough approach to painting prep steps. This includes cleaning surfaces to remove dirt and grease, making necessary repairs to fill holes and cracks, and sanding to create a better surface for paint to grip. Prioritizing these foundational stages will lead to a more durable and professional-looking result for your project. |
| How does cleaning surfaces impact the final paint job? | Cleaning surfaces removes dirt, grease, and grime that can prevent paint from sticking properly. This ensures a clean base for optimal adhesion, which is a key factor in achieving a smooth and long-lasting finish. Without proper cleaning, the new paint may not adhere correctly. |
| When is it advisable to hire professionals for painting prep work in Edmonton? | Hiring professionals for prep work is advisable when dealing with extensive drywall repair, multiple layers of old paint that need removal, or when working on high ceilings and difficult-to-reach areas. Professionals have the right equipment and experience for these tasks, ensuring a superior foundation for your paint job. |
| What is the benefit of sanding surfaces before painting? | Sanding surfaces creates a slightly roughened texture. This texture provides better grip for the new paint, especially on glossy or previously painted surfaces. It helps ensure the paint adheres correctly and contributes to a smoother, more uniform coat. |