Preparing Your Home for Professional Painters
Embarking on a home painting project is an exciting way to refresh your living space, but the success of the transformation hinges significantly on thorough preparation. Properly preparing your home before professional painters arrive ensures a smoother process, minimizes disruptions, and ultimately leads to a superior, longer-lasting finish. This upfront effort not only protects your belongings but also allows the painting team to work efficiently and effectively, translating into a beautiful result you'll love. Understanding the importance of proper prep work pays off is the first step towards a seamless painting experience.
When you decide to hire professionals, it's about more than just applying paint; it's about achieving a high-quality outcome that reflects expertise. Our DIY vs. Pro top 5 painting mistakes article highlights how professional preparation can prevent common errors that detract from the final look. By taking the time to prepare your home, you are investing in the longevity and aesthetic appeal of your newly painted surfaces, ensuring the paint job looks fantastic for years to come. Consider the real cost of painting your home to understand the value professional services bring, including their meticulous preparation.
This preparation phase is crucial for any interior or exterior painting project. Whether you're updating a single room or your entire home's facade, the underlying principles of preparation remain the same. A well-prepared surface is the foundation of a great paint job, preventing issues like peeling, bubbling, or uneven application. For a comprehensive overview of what to expect, our house painting checklist offers valuable insights into the entire process, emphasizing why preparation is key.
Declutter and Clear the Space
A clutter-free environment is essential for professional painters to access all necessary areas efficiently. Clearing rooms and living spaces of personal items, decor, and furniture allows painters to move freely and reach every part of the walls and ceilings without obstruction. This not only speeds up the painting process but also significantly reduces the risk of accidental damage to your belongings. It’s a fundamental step that benefits both the efficiency of the painting crew and the safety of your possessions.
Key areas that require attention include removing wall hangings, curtains, and any loose items from surfaces. It’s also advisable to consolidate smaller items into boxes and move them to the center of the room or, ideally, to another area entirely. This ensures that painters have clear access to the walls for proper surface preparation and application. Our guide on why professional painters save you time and money touches upon how efficient access through a clear space contributes to project timelines.
When preparing spaces, consider consolidating items into a central area, making it easier for painters to work around them. For larger items that cannot be moved, ensure they are grouped together. This organized approach streamlines the painter's workflow, allowing them to focus on the task at hand without navigating around obstacles. Thinking ahead about home remodels with quick impact and great ROI can also include the preparation phase as part of maximizing your investment.
Protecting Furniture and Flooring
Safeguarding your furniture and flooring from paint splatters and accidental drips is a paramount step in preparing your home for professional painters. Taking the time to properly cover and protect these valuable items ensures they remain untouched by errant paint, preventing the need for difficult cleanups or costly replacements. This diligence protects your investments and contributes to a clean final result.
When moving furniture, it's best to consolidate larger pieces towards the center of the room. For items that cannot be easily relocated, such as heavy sofas or built-in cabinets, ensure they are thoroughly covered with protective sheeting. For flooring, high-quality drop cloths are indispensable. Choosing the right material for your drop cloths can make a significant difference in protecting against spills and maintaining a safe work environment.
| Drop Cloth Material | Pros | Cons | Best For |
|---|---|---|---|
| Canvas | Highly absorbent, durable, slip-resistant | Can be heavy, more expensive | High-traffic areas, longer projects, wood floors |
| Plastic/Polyethylene | Inexpensive, waterproof, lightweight | Slippery, not absorbent (spills can spread) | Protecting against wet materials, short-term use |
| Rosin Paper | Absorbent, provides a non-slip surface | Less durable than canvas, can tear | Protecting hard surfaces, lighter duty tasks |
By investing in appropriate protective materials, you ensure that your home’s interior remains pristine throughout the painting process. This careful attention to detail is part of what makes hiring professionals a worthwhile endeavor, as they often manage these protective measures as part of their service. For those considering upgrades, understanding which upgrades boost your home's value can extend to the protective measures taken during renovations.
Securing Valuables and Delicate Items
Beyond furniture, it is crucial to remove or securely store smaller, more delicate items. This includes anything fragile, electronic equipment, or cherished keepsakes that could be damaged by dust or paint. Even small items left on shelves or countertops can become obstacles or get accidentally splattered. Taking a few extra minutes to pack these away in boxes or move them to a designated safe zone greatly assists the painters and protects your belongings.
Covering Unmovable Fixtures and Appliances
Some items, like large built-in appliances or wall-mounted televisions, cannot be easily moved. For these, it's essential to cover them thoroughly using plastic sheeting and painter's tape. Ensure that all edges are sealed tightly to prevent paint mist or dust from entering sensitive components. This level of protection is vital for electronics and appliances that could be permanently damaged by paint. Our guide on how to choose the right paint finish for your living room also implies the need for careful prep around existing fixtures.
Preparing Floor Surfaces for Maximum Protection
While drop cloths are the primary defense for flooring, consider the type of flooring you have. For hardwood or laminate floors, a non-slip drop cloth like canvas is preferable to prevent accidental slips, which could damage both the floor and the painter. For tile or concrete, plastic sheeting can be effective, but ensure it is secured to prevent movement. Any area that won't be painted but is in the painters' path should also be covered to protect against scuffs and dirt tracked in from outside.
Wall and Surface Preparation
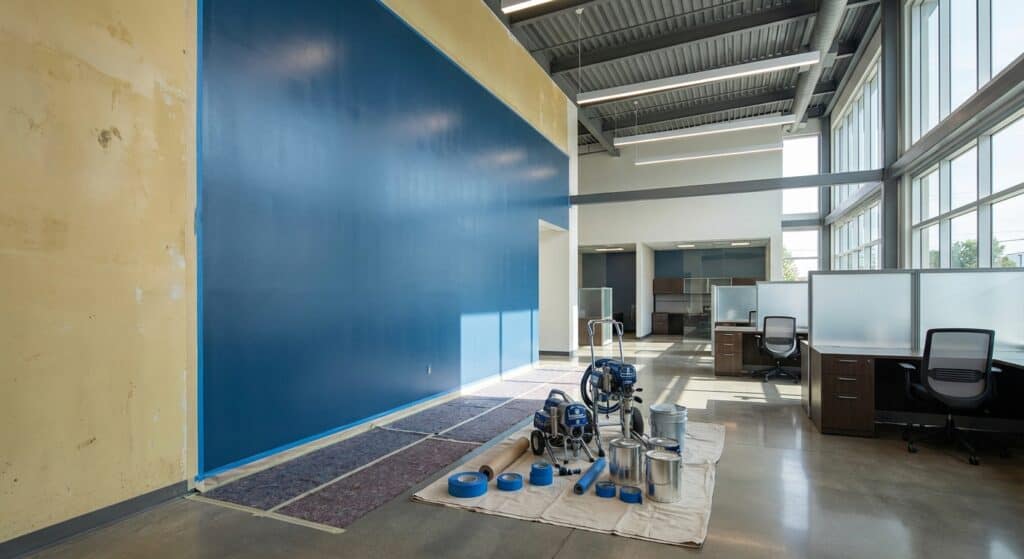
Achieving a flawless and durable paint finish begins long before the first coat is applied; it starts with meticulous wall and surface preparation. This crucial stage involves cleaning away grime, patching imperfections, and ensuring surfaces are smooth and ready to receive paint. Skipping these steps can lead to a subpar outcome, with paint peeling, bubbling, or revealing underlying flaws. Professional painters dedicate significant time to this phase because they understand its impact on the final aesthetic and longevity of the paint job.
Essential wall preparation steps ensure that the new paint adheres properly and looks its best. These include washing down walls to remove dirt, grease, and any residues that could interfere with adhesion. Any holes from nails or screws, cracks, or imperfections in the drywall must be filled with patching compound, allowed to dry, and then sanded smooth. Light sanding of glossy surfaces also helps create a better "tooth" for the new paint to grip. This dedication to detail is something our experienced team excels at, ensuring a professional finish every time.
- Clean the Walls Thoroughly wash all surfaces to be painted, removing any dirt, grease, or cobwebs.
- Repair Imperfections Fill any holes, cracks, or gouges with spackling or patching compound. Let it dry completely.
- Sand Smooth Once dry, sand the patched areas smooth, feathering the edges into the surrounding wall. Lightly sand any glossy surfaces for better adhesion.
- Wipe Down After sanding, wipe down all surfaces with a damp cloth to remove dust.
- Prime (if necessary) Apply a primer to patched areas or over dark colors to ensure even coverage and true color.
Our expertise in preparing surfaces for painting means we understand the nuances of different wall types and conditions. This hands-on experience allows us to identify and address potential issues before they become problems, guaranteeing a smooth, uniform finish that truly transforms your space. For insights into common pitfalls, our article on top 5 painting mistakes homeowners make often points to inadequate surface preparation.
Window Treatments and Fixtures
Proper handling of window treatments and fixtures is a critical, often overlooked, aspect of preparing your home for professional painters. These elements can easily get in the way, become targets for accidental paint splatters, or be damaged if not addressed. Taking the time to remove or carefully secure curtains, blinds, and surrounding fixtures ensures that painters can work unimpeded and protects these items from paint.
It is generally recommended to remove curtains, drapes, and blinds entirely if possible. This provides painters with unobstructed access to walls and windows. If removal isn't feasible, ensure they are carefully folded and secured away from the painting area, perhaps with plastic sheeting and tape. Light fixtures, switch plates, and outlet covers should also be removed or covered securely. For items that cannot be removed, such as built-in shelving or window frames that will not be painted, meticulous masking with painter's tape and plastic sheeting is essential.
- Remove curtains and curtain rods.
- Take down blinds or carefully secure them.
- Remove light fixtures, vent covers, and switch/outlet plates.
- Cover windowsills and any adjacent trim that won't be painted.
- Secure large furniture pieces away from windows.
Addressing these details ensures that your window treatments and surrounding fixtures are protected, and the painters have full access to perform their work. This attention to detail contributes to a clean, professional finish and avoids unnecessary damage. Thinking about home remodels with quick impact and great ROI can certainly include the aesthetic impact of well-maintained window areas post-painting.
Preparing for Daily Access and Pets
As professional painters work through your home, it's important to consider practical aspects that ensure smooth daily operations and the safety of your household members, especially pets. Making sure painters have clear and consistent access to the work areas each day minimizes delays and disruptions. Simultaneously, securing pets is vital to prevent them from interfering with the painters' work or accidentally encountering wet paint or hazardous materials.
Ensuring clear access for painters involves keeping walkways and the immediate work zones free of clutter. This means consolidating any remaining items and ensuring doors to work areas are easily accessible. For pet owners, creating a safe haven for pets away from the active painting zones is paramount. This might involve designating a specific room for them, ensuring they have food, water, and comfort, and communicating with the painting crew about your pet's routine and location. Our guide on what business owners should ask commercial painters can also offer insights into professional conduct and minimizing disruption.
By planning for daily access and pet safety, you contribute to a harmonious and productive painting project. This proactive approach helps manage household dynamics effectively while the professionals transform your space. It also ensures that your furry family members remain safe and undisturbed throughout the process.
Exterior Prep. Washing and Repairs
Preparing the exterior of your home for professional painting is as crucial as interior preparation, if not more so, given the impact of weather and environmental factors. Thorough washing of surfaces removes dirt, mildew, and chalking paint, which can compromise the adhesion and longevity of the new paint. Addressing any necessary repairs, such as caulking gaps or fixing minor damage, ensures a sound foundation for the paint job, leading to a more durable and aesthetically pleasing finish. Considering the best times for exterior painting is also key to a successful outcome.
A checklist for exterior surface cleaning ensures that all necessary steps are taken before painting begins. This typically involves power washing or hand scrubbing walls to remove all contaminants. Inspecting the entire exterior for loose or peeling paint, cracks in siding, damaged trim, or deteriorating caulk is also essential. These issues must be repaired promptly to prevent moisture intrusion and ensure the new paint adheres correctly. Our article on how weather affects exterior painting underscores the importance of a clean and sound surface for durability.
| Exterior Surface Cleaning Checklist | Status | Notes |
|---|---|---|
| Wash Walls | Done | Used power washer on low setting |
| Remove Mildew/Algae | Done | Treated with appropriate cleaner |
| Scrape Loose Paint | Done | Addressed peeling areas on trim |
| Caulk Gaps & Cracks | Done | Sealed around windows and doors |
| Repair Damaged Siding/Trim | Done | Replaced small section of rotted wood |
| Clean Gutters & Downspouts | Done | Ensured clear water flow |
| Inspect for Rot/Insect Damage | Done | No significant issues found |
This meticulous approach to exterior preparation, including washing and repairs, is fundamental to achieving a beautiful and long-lasting finish. It ensures that the paint has the best possible surface to adhere to, protecting your home from the elements and enhancing its curb appeal for years to come. For those looking to make impactful improvements, understanding home improvements with the best ROI highlights how exterior painting is a significant value-add.
Conclusion. A Smooth Painting Experience
In conclusion, the journey to a beautifully painted home is significantly enhanced by a commitment to thorough preparation. By taking the time to declutter spaces, protect your belongings, prepare walls and surfaces, manage fixtures, and address exterior needs, you lay the groundwork for a professional painting project that is not only efficient but also yields exceptional, lasting results. This diligent preparation minimizes stress, safeguards your home, and allows our skilled team to focus on delivering the high-quality finish you expect.
Embracing these preparatory steps is an investment in the overall success of your painting project. It demonstrates a commitment to quality that aligns with the professional standards we uphold. Remember that a smooth painting experience is a collaborative effort, and your role in preparing your home is invaluable. We are dedicated to making your painting project as seamless and satisfying as possible, from the initial consultation to the final brushstroke.
We encourage you to reach out to our team to discuss your upcoming painting needs. Whether it’s interior refreshes or exterior transformations, our experts are ready to bring your vision to life with professionalism and care. Explore our interior painting services or learn more about our exterior painting expertise to see how we can help you achieve a beautiful, durable finish. Considering the impact of your choices, our guide on latex vs. oil paint can help inform other decisions related to your project.
Frequently Asked Questions About Preparing Your Home for Professional Painters
| Question | Helpful Answer |
|---|---|
| What is the most important preparation step before painters arrive? | The most important step is to declutter and clear the space. This allows painters easy access to walls and surfaces, ensuring efficient work and reducing the risk of damage to your belongings. |
| Do I need to move all my furniture out of the room? | It is ideal to move smaller furniture items out of the room or to the center. For larger, immovable pieces, ensure they are thoroughly covered with protective sheeting to prevent paint splatters. |
| How should I protect my floors from paint? | Use high-quality drop cloths made of absorbent material like canvas or rosin paper. Secure them properly to prevent slipping and ensure they cover the entire floor area accessible to painters. |
| Should I remove light fixtures and outlet covers? | Yes, it is highly recommended to remove light fixtures, switch plates, and outlet covers. This ensures a clean paint line around these areas and prevents them from getting painted over. |
| What about exterior preparation like washing? | Exterior preparation involves washing the surfaces to remove dirt, mildew, and chalking paint. It's also crucial to address any repairs, such as caulking gaps or fixing damaged siding, before painting begins. |