Common Painting Mistakes Homeowners Make
Embarking on a painting project can significantly refresh your living space, but homeowners often make common painting mistakes that detract from the desired professional finish. Understanding these pitfalls is the first step toward achieving a smooth, durable, and aesthetically pleasing result. From inadequate preparation to poor application techniques, recognizing these errors can save you time, money, and frustration.
Many DIY painting projects fall short due to overlooked details in preparation and application. Without proper planning and execution, even the best paint can look less than ideal. This guide will walk you through the most frequent mistakes homeowners make and provide actionable advice on how to avoid them, ensuring your next painting endeavor is a success. For those seeking expert assistance, our professional house painting services are designed to deliver flawless results every time.
Avoiding these common errors is crucial for a lasting and beautiful outcome. Whether you're tackling an interior refresh or an exterior overhaul, knowing what to look out for can make all the difference. We offer comprehensive painting tips to help you navigate your project with confidence.
Common Preparation Mistakes
Proper preparation is the cornerstone of any successful painting project, yet it's often the area where homeowners make the most significant errors. Rushing through surface cleaning, failing to properly mask areas, or not addressing existing damage can lead to a subpar finish that peels, cracks, or shows imperfections prematurely. Investing time in thorough preparation is just as important as choosing the right paint color.
The difference between a DIY preparation job and one done by professionals can be stark. While a homeowner might quickly wipe down walls, a professional painter understands the necessity of degreasing, sanding, and priming surfaces to ensure optimal paint adhesion and longevity. This meticulous approach prevents future issues like peeling or bubbling paint. To learn more about the importance of preparation, consider exploring prep work that pays off.
| DIY Preparation | Professional Preparation |
|---|---|
| Quick wipe-down of walls | Thorough cleaning, degreasing, and stain removal |
| Minimal sanding or scuffing | Detailed sanding to create a smooth, uniform surface |
| Incomplete masking of trim and fixtures | Precise masking with high-quality painter's tape for sharp lines |
| Minor crack filling | Comprehensive filling and smoothing of all cracks and holes |
| Skipping primer or using the wrong type | Applying the appropriate primer for optimal adhesion and coverage |
For homeowners looking to ensure their surfaces are perfectly prepped, our team offers expert preparation services to guarantee a flawless finish. Understanding the importance of exterior painting preparation is key to a lasting result.
Tool and Material Missteps
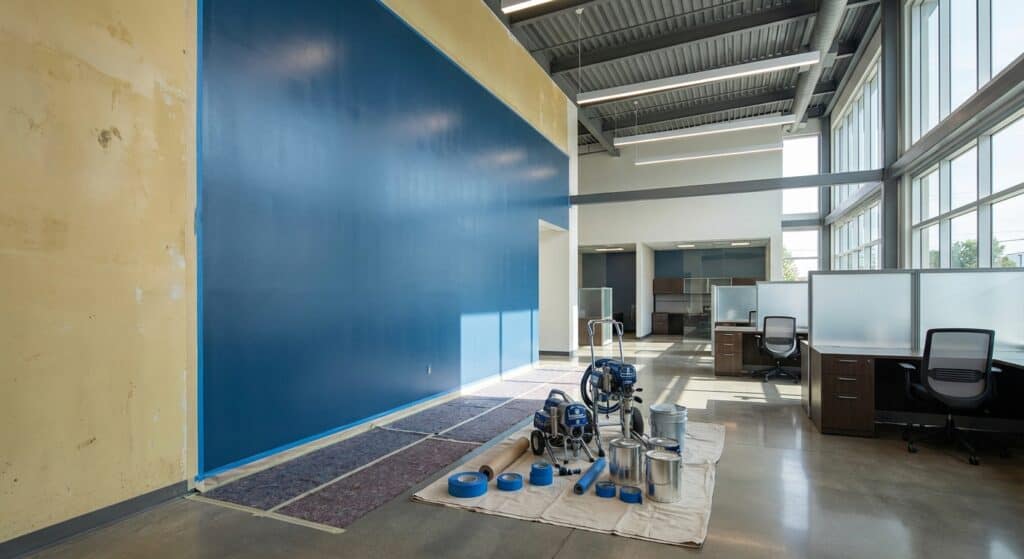
Choosing the right tools and materials is just as vital as preparation for achieving professional painting results. Many homeowners opt for the cheapest available options or use tools not suited for the task, which can lead to streaky finishes, uneven coverage, and a generally disappointing outcome. The quality of your tools and materials directly impacts the final appearance and durability of your paint job.
Essential Tools for a Flawless Finish
Using the correct tools can make a significant difference in the ease of application and the quality of the final coat. Investing in good quality brushes, rollers, and other essential items ensures that you can achieve smooth, even coverage without frustrating streaks or drips. Proper tools also contribute to a more efficient painting process.
- High-quality brushes (angled for trim, flat for larger areas)
- Roller frames and appropriate roller covers (nap size based on surface texture)
- Paint trays and liners
- Drop cloths or plastic sheeting for protection
- Painter's tape for clean lines
- Sanding sponges or sandpaper for surface preparation
- Putty knife or scraper for filling holes
- Caulking gun for sealing gaps
For those looking for superior results, understanding the difference between latex vs. oil-based paint is crucial. Our services ensure that only the best materials are used for your project.
The Impact of Paint Quality
The quality of the paint itself plays a significant role in how well it applies and how long it lasts. Cheap, low-quality paints often have poor coverage, requiring more coats, and are less durable, making them prone to chipping and fading. High-quality paints, on the other hand, offer better coverage, a richer color, and superior resistance to wear and tear.
When selecting paint, consider its sheen, durability, and suitability for the specific surface. For example, a bathroom or kitchen might require a paint with higher moisture and stain resistance compared to a bedroom. Consulting with professionals can help you choose the ideal paint finish for your living room and other areas of your home.
Choosing the Right Primer
Primer is an essential but often overlooked material that forms the foundation for your paint job. Using the wrong type of primer, or skipping it altogether, can lead to poor adhesion, uneven color, and the need for extra coats of paint. A good primer seals porous surfaces, blocks stains, and provides a uniform base for your topcoat, ensuring better color depth and longevity.
Whether you're painting over dark colors, covering water stains, or working with new drywall, the right primer is key. It helps ensure that your final paint color appears true and that the finish is smooth and consistent. Proper priming is a critical step in achieving professional-looking results.
Application Technique Errors
Even with perfect preparation and the best tools, incorrect paint application techniques can ruin the final look of your project. Homeowners often make mistakes such as applying paint too thickly, brushing or rolling in inconsistent directions, or not allowing adequate drying time between coats. These errors can result in visible brush marks, uneven sheen, drips, and a generally unprofessional appearance.
For a flawless finish, follow these steps carefully. Ensuring each coat is applied evenly and allowed to cure properly is paramount to achieving a durable and attractive result.
- Apply paint in consistent, overlapping strokes. Whether brushing or rolling, maintain a wet edge and apply paint in smooth, overlapping strokes to avoid lap marks and ensure uniform coverage.
- Use light, even pressure. Avoid pressing too hard with your brush or roller, as this can lead to uneven paint distribution and visible marks.
- Allow proper drying time. Always follow the manufacturer's recommendations for drying and recoating times. Rushing this process can cause peeling, blistering, or poor adhesion.
- Work in manageable sections. For larger areas, divide the wall into sections you can complete efficiently before the paint begins to dry, ensuring a seamless finish.
- Clean tools immediately. Clean brushes and rollers thoroughly after each use to maintain their condition and ensure they are ready for future projects.
Our team of experts understands the nuances of paint application, ensuring a smooth and even finish every time. We have extensive experience in interior painting and are adept at avoiding common application errors.
Color Selection and Lighting Issues
Choosing paint colors and understanding how lighting affects them is another area where homeowners frequently stumble. A color that looks stunning in a showroom or on a small swatch can appear drastically different on a large wall under various lighting conditions. This mismatch can lead to disappointment and the costly need to repaint.
Careful consideration of how natural and artificial light interacts with your chosen paint is essential. Different sheens also reflect light differently, impacting the perceived color and overall ambiance of a room. Consulting with a color professional can help you make informed decisions and avoid costly mistakes. For guidance on choosing the right shades, explore our resources on interior paint color trends.
When selecting colors for your home, consider sampling them on your walls before committing to the entire project. This allows you to see how the colors look in your specific lighting throughout the day and night. Understanding how different shades can affect the mood and perception of space is key to achieving your desired aesthetic. For advice on specific rooms, check out our guide on choosing the right paint finish for your living room.
Mistakes Related to Taping and Edging
Achieving crisp, clean lines between different colors or between walls and trim is a hallmark of a professional paint job. However, many homeowners struggle with tape application and removal, leading to paint bleed, uneven edges, and a messy appearance. This can quickly transform a planned refresh into a frustrating DIY disaster.
Using the wrong type of tape or not applying it correctly are common errors. Ensure you use high-quality painter's tape designed for the surface you are painting and press down firmly along the edges to create a seal. Removing the tape at the right time – usually when the paint is dry to the touch but not fully cured – is also critical to prevent peeling.
- Use high-quality painter's tape designed for your surface.
- Press tape down firmly to create a tight seal and prevent bleed.
- Remove tape slowly and at an angle once the paint is dry to the touch.
- Consider using a thin blade or putty knife to score the edge of the tape before removal if paint has dried completely.
- For intricate details, a steady hand and a fine-tipped brush may be necessary for touch-ups.
These tips can help you achieve the clean lines essential for a polished look. Avoiding DIY painting mistakes often comes down to attention to detail.
How to Fix Common Painting Mistakes
Even with the best intentions, painting mistakes can happen. Fortunately, most common errors are fixable with the right approach and a bit of patience. Whether you’ve encountered drips, uneven coverage, or paint bleed, understanding how to correct these issues can save your project from ruin.
For minor drips or runs, allow the paint to dry fully, then gently scrape or sand the imperfection smooth before applying a second coat. If you notice uneven coverage or visible brush marks, a light sanding followed by another thin coat of paint can often rectify the problem. Paint bleed under tape can usually be cleaned up with a small brush and a matching paint color or by carefully scraping away the excess dried paint.
For more significant issues like peeling or bubbling paint, it’s crucial to scrape away the affected areas, sand the surface smooth, apply a suitable primer, and then repaint. Addressing these problems promptly will ensure a smooth, professional finish. You can find more tips on avoiding common painting mistakes and how to correct them.
When to Call a Professional Painter
While DIY painting can seem like a cost-saving measure, many homeowners find that the time, effort, and potential for costly mistakes outweigh the perceived savings. Professional painters possess the expertise, tools, and experience to avoid common pitfalls, ensuring a high-quality finish that significantly enhances your home's appearance and value. Hiring professionals is often the smartest choice for achieving superior results.
A professional painter understands the intricacies of surface preparation, material selection, and application techniques. They can identify potential issues before they become problems, such as moisture damage or structural weaknesses, and address them appropriately. This expertise ensures a durable and beautiful finish that stands the test of time. For example, understanding what business owners should ask commercial painters highlights the depth of knowledge professionals bring.
The value of professional expertise in painting cannot be overstated; it transforms a daunting task into a seamless process with guaranteed quality.
Choosing to hire professionals for your next painting project means you can avoid the stress and common errors associated with DIY attempts. They ensure that every aspect of the job, from initial preparation to the final stroke, is executed with precision. For a truly exceptional finish, consider our expert house painting services.
Conclusion. Achieve a Flawless Finish
Avoiding common painting mistakes is essential for achieving the beautiful, lasting results every homeowner desires. From meticulous preparation and the selection of quality materials to precise application techniques, each step plays a critical role. While DIY painting can be rewarding, recognizing when a project demands professional expertise can save you from frustration and ensure a superior outcome.
Our experienced team is dedicated to providing top-tier residential painting services that transform your vision into reality. We handle every detail with precision, ensuring a flawless finish that enhances your home's aesthetic and value. For a free estimate on your next project or to discuss your specific needs, please contact us today. Let us help you achieve the perfect look for your home, free from the common errors that plague DIY painters.
Frequently Asked Questions About Painting Mistakes
| Question | Helpful Answer |
|---|---|
| What is the most common painting mistake homeowners make? | The most common mistake is inadequate preparation, such as failing to clean surfaces thoroughly, fill holes, or sand properly. This leads to poor paint adhesion and an uneven finish. |
| How can I avoid paint drips and runs? | Apply paint in thin, even coats using consistent strokes. Avoid overloading your brush or roller. If drips occur, address them while the paint is still wet by smoothing them out. |
| Is it better to use latex or oil-based paint? | Latex paint is generally preferred for most interior and exterior applications due to its flexibility, durability, and easier cleanup. Oil-based paints are typically used for high-gloss finishes or areas requiring extreme durability. Learn more about latex vs. oil-based paint. |
| How do I get clean lines when painting trim? | Use high-quality painter's tape and press it down firmly to create a seal. Remove the tape slowly at an angle once the paint is dry to the touch but not fully cured. |
| When should I consider hiring a professional painter instead of doing it myself? | If your project involves high ceilings, intricate details, or requires extensive preparation, or if you lack the time or confidence, hiring a professional is often the best choice for a superior, hassle-free result. Our professional house painting services can ensure a perfect finish. |